

Mother's Day Cards
One of the days of the year arrives where you must show the affection you feel towards your mother and doubts arise between buying the details and making them yourself. You choose which option you prefer, of course, buying it will not take up much time, it will save you headaches, but think that receiving your mother something that you have made with your own hands is priceless. That time you have wasted thinking what to do, how to do it, the material, the detail...
Instructions
- A pocket card. How to do it? You will need to start with this material, we tell you the basics, think that you can always add more things depending on the decoration you want to put on or decorate it. Write down: scissors to cut out, cardboard paper in the color you want the card to be, stickers or various decorations that will be the decorations that you are going to place, glue or stick, a ruler, jellies, chocolates or some small detail.
- Let's start: you will need to take the cardboard to make the base of the card. Do then as a folder. How to do it? Easy. Take the cardboard and cut out a rectangle. Think about the measurements that your card will have. If you are not going to make it giant or a special size, it will be standard. So we'll be basing it on a normal sized card. More or less between forty and fifty by 22 or 25 cm.
- Once the folder is made (we tell you how to do it in case you don't know), it's as easy as folding a measure of about fifteen centimeters by thirty and the other end of thirty or 35 centimeters. Once done, you should be left with something similar to a pocket or folder. If you see that it does not come out, keep insisting. It is vital that it comes out perfect. That pocket or folder is what will give the different point to your card and, in addition, it will help you to put a mini postcard, a chocolate, etc. inside a letter.
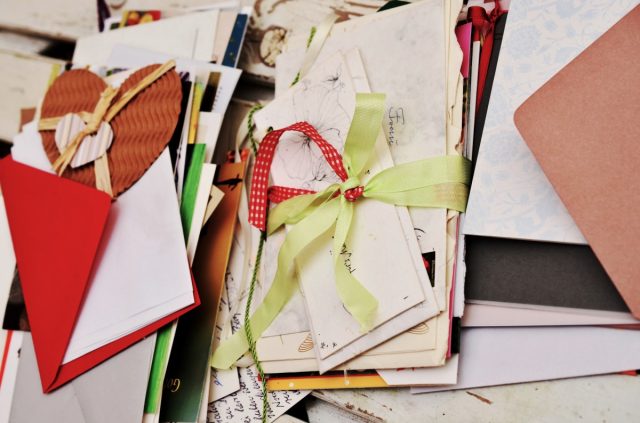
- Once you have made your postcard with the pocket, it will be your turn to decorate the card. Here, your personal touch is what rules. From pasting personal photographs, writing poems, writing phrases, writing what you want to your mother, pasting glitter, colored ribbons, etc. Or even paste, for example, heart-shaped lollipops or stickers that have relief to give it a different touch and be, above all, original.
- A 3D rose (or the flower that your mother likes the most). For this you will need a cardboard or Eva rubber. You can choose both to give greater relief to the flower. Choose the material that suits you best. It can be cardboard and EVA foam to make the rose. The colors are your choice. From simpler colors to bright colors and glitter. If it is a rose, the red with glitter and the green of the stem with glitter are more striking. To make it stand out more, a black cardboard. How to make the card? Buy the materials that we have mentioned, glue, scissors and a pencil to draw.
- Draw on the foam on the back (where the shiny part is not) make the shape of the rose. You can choose to make it whole with the stem and everything and you will paste it later in another color or, make only the flower part. We have selected a rose, but you can choose any flower. In fact, think of the one that your mother likes and try to make it for her. If you are not very good at drawing, look online to make a pattern. When you have drawn it in pencil, cut it out with scissors. You should now have the shape of the flower (with or without stem).
- Well, the last step would be to choose where you want to paste the flower on the card. Be original. There are many options. It can be in the center, in a corner, several flowers... leave your imagination free.
- Flying hearts/heart balloons. This card is super simple to make and at the same time, it is very striking and beautiful. You can choose to do it in two ways. Or, with the same colors or colorful. Think about it because based on that, you will need more or less material.
- A cardboard as a basis for the card. The color that you like the most. Basic, you fold it in half and you already have the card. Now, the cool thing about the card. You must choose the colors for the hearts. The two options: either one color only or several. If you choose only one, then buy a sheet of cardboard and if there are several, a sheet of each color. Scissors, a pencil, a glue stick, and string or thread. What are the threads or cords for? Well, to give that sensation of balloons. The balloon strings. Also here you can play with colors. Or of the same tone or of varied colors.
- Once you have the material prepared, all you have to do is draw hearts on the cardboard or colored sheets. If you are not very good at making them, you can choose to look online and print one that serves as a model. Then you just have to cut it out and use it as a model.
- When you have drawn and cut out all the hearts, you can do two things. We give you two options: the first, that you can stick them as is on the cardboard or, fold the hearts in half. What is achieved by doing this is that the hearts acquire greater volume, they give the appearance of being 3D, more movement... the truth is that it is worth trying, it is much better and fills the card more. Once you have placed them all (which can be more or less according to your preferences) you can place them in the middle of the card, in a cascade format, central, but one on top of the other to give it more volume, etc. . And then it remains to stick them with glue and attach the strings to them. Of course, for it to look good, the laces, ribbons or whatever you have chosen must be placed wisely. Below the hearts, to the end of the card, you can give them a bit of movement…
- Natural and bright flowers. To make this card you will need a cardboard base. Choose as always the color you prefer (take into account your mother's favorite color, for example). Next, you will need scissors, some shiny stones that are sold in any stationery store or craft center (to choose only one color or several that you like) and the special thing about this card is that the flowers will be... natural! You can choose the flowers that are your mother's favorites that will make it even more special.
- Try to keep the flowers from wilting by taking these two tips into account. One: if you are going to choose to take several flowers and paste those on the card, then paste the flowers at the last moment. This way they will be fresh and they will not have withered. On the contrary, option two: Make a bouquet of flowers and join them with a pretty ribbon or string. You keep them in water and at the last moment you make a double side with tape or packing tape on the card and glue them. When your mother has seen the card, she will have the option to remove the flowers from the double-sided tape and put them in water. Look, it's a two in one. A small bunch of flowers and a card.
- On the front side of the card, glue the stones, pearls or rhinestones with glue. When you see that it more or less has the design you like, start with the flowers. Here there are several alternatives: on the one hand, even take some flowers from a field or forest and it will only be enough to wait until the last moments (so that they remain fresh and have not withered) and paste them carefully on the card. Let it be beautiful the other option (more original) will be to take the flowers, but place them in such a way that you make a small bouquet or bouquet. You can add a nice ribbon to hold it or tie it and only when you have to deliver the card you do the following. You paste in the central part, a tape or double-sided adhesive. And you place the corsage in the area of the ribbon on top. For it to hold on. Thus, it is a very cool alternative and you will surely love it. The result is original and very beautiful. You can make the hearts the size you like the most and even make some extras so that they are both on the front of the card and inside.
When you have decided, stick on the part that has no shine and stick to the card. There should be a 3d type contrast. Above all, because EVA foam is thicker than cardboard. Inside the card is free...written what you want or decide to attach a nice photograph or symbolic and/or special things.
What do you need
- Scissors.
- Double-sided adhesive, tape or tape.
- glue-stick
- A pencil.
- Colored cardboard.
- Eva rubber sheets.
- Cords, ribbons, threads, etc.
- Poems, beautiful phrases, photographs...
Tips
We have proposed several alternatives that are very successful; they are not expensive at all, suitable for all budgets, easy to do, even if you are not very crafty. There will always be the least complicated option, go to a stationery store and buy a nice card for Mother's Day. But what is intended is to break with that. Draw attention, be original, break with the established and surprise the woman you love the most. Surely a card that you have made yourself (no matter how regular the result is) makes you much more excited than one that you have bought. Because being honest... something that is done with your own hands, with your time and with enthusiasm is always more valued and goes deeper.
Of course, if you don't have the material that we mentioned, you can change it as you go. Adding more or less or subtracting. You can always take advantage of stationery material that you have at home, small colored paper cutouts, tapes, adhesives...
The smallest of the house love these crafts and it is an activity that comes in handy to entertain them and to let their creativity fly. It is important to let them be the ones who decide, that they have initiative, yes, always controlling what they do and how, keep in mind that scissors, glue and small items that can be put in the mouth are used. Always be vigilant to avoid scares.