

How to Make a Party Hat for a Baby
As our son approached his first birthday, I searched high and low for ideas, decorations, outfits, food for the baby's first anniversary party, you name it. It was the summer of 2011 and my big goal was to do everything possible to have a great party. From invitations to thank you tags to food signs to a 1st birthday party hat, I wanted to do it all. And I did it!
I didn't know how to make a party hat, but I thought it wouldn't be difficult. So, I scoured blogs for 1st birthday party hats and everything else, and got really inspired!
Turns out our baby’s first birthday party, and all of its decorations, were a huge success. The hat was my favorite. Later that same year, my friends also started calling me to do their party decorations.
How to create a baby party hat?
So, without further ado, here is my step-by-step tutorial on how to make a first birthday hat and how you can modify it to fit older children and adults as well.
Necessary supplies. Baby party hat
- Cardstock, the color you prefer. I like to use 12×12 sheets, but 8.5×11 works well too.
- 1 spool of 3/8-inch-wide tape, in the color of your choice. I like to use a grosgrain ribbon. You will need about 60 inches or less.
- Glue gun and hot glue sticks.
- 1/8" circular hand
- Natural cotton yarn.
- Wide eye needle.
- 2 inch pomp poems.
- Craft scissors.
- Transparent tape.
- 5-inch sticker maker (optional).
- Decorations (optional).
Steps to make a baby party hat
Step 1
Print the party hat template on white paper. For a sturdier stencil that's easy to handle and lasts longer, print on 110-pound white cardstock.
Step 2
Place the cutout template on the card stock of your choice for the party hat and trace the outline.
Party hats sit on top of the head; they do not cover the whole head. You will only have to adjust the length of the ties accordingly.
Step 3
Using scissors simply cut around the party hat you traced. Set the remaining card stock aside.
The reason I don't insert the tab into the indentation is that the cardstock tends to be heavy and it comes off, opening the hat. So I like to overlay it and secure it with hot glue.
Step 4
Slightly bend the cardstock to create the cone. Look how the cardboard has taken the shape of a cone.
Turn on the hot glue gun and wait until the glue is hot and melts, almost oozing from the tip of the glue gun.
Hot glue dries almost instantly, so you’ll need to work fast for this step.
Squeeze a line of hot glue onto the tab, grab the other end of the cone, and place it right on top. Apply pressure so that both ends adhere. Hot glue will dry in seconds. You now have the cone for your DIY party hat.
Optional step
Sometimes, after overlapping, the seam on the party that isn't pretty, so I cover it with a thin strip of ribbon in the same color as the cardstock. This step is not necessary; it just makes for a better finish, especially if you plan on selling the party hats.
Steps 5
Cut a 30 cm string of cotton thread and tie a small knot at one end of the string. Thread the other end through the needle.
Push the needle through one side of the pomp until it comes out the opposite side. The knot will prevent the string from going through the pomp. The knot will be buried, you will not see it.
Step 6
You will notice that after the party hat is shaped there will be a very small opening at the top of the cone.
With the yarn still threaded through the needle and the pomp hanging off the other end of the yarn, drop the needle through the small hole at the top of the hat.
Pull the string from the other side, remove the needle, and secure the string firmly with a small piece of clear tape. The pomp will sit on top of the hat, but it will wobble.
Step 7
For this step, you need to cut 3 pieces of tape.
One piece will wrap around the round perimeter of the cone. For this particular party hat template, you will need 15 inches. You can add a bit more (and then trim off the excess) but no less than 15 inches.
The other two pieces will be the ties for the baby party hat. The length of these two pieces of ribbon will depend on who will be wearing the hat. If you're going to make a first birthday hat, 20 inches for each piece is more than enough ribbon to tie and even make a bow.
These DIY party hats are designed to sit "on top of your head" and don't need to cover the entire circumference of your head. What you will need to do is adjust the length of the ribbon loops.
If you are making adult hats, measure yourself and estimate how much ribbon you will need to tie the party hats under an adult's chin.
Step 8
It's time to cut out your DIY party hat.
For years, I used hot glue to glue the brim to the party hat. I worked in sections, slowly squeezing hot glue around the edge of the cone and attaching the tape.
This method works perfectly fine, and if you're careful, the brim of your hat will be perfect. However, now I use a different method.
Push the 15-inch piece of tape through the adhesive maker (optional), this will make a sticky backing. With an adhesive backing, attaching the ribbon to the party hat becomes a much easier, cleaner, and faster method.
Step 9
As a reminder, be sure to measure these two pieces of tape to ensure they fit the person wearing the hat. If it's a party hat for a baby's first birthday, you'll need the two pieces to be no less than 20 inches long each.
Find the front of the party hat (the seam to the opposite side) and proceed to punch a small hole in each side of it with the 1/8-inch punch.
Thread the ribbon through the hole and tie a small knot at the end of the one inside the hat.
Pull the thread until the knot stops it.
Steps 10
Optional: add embellishments.
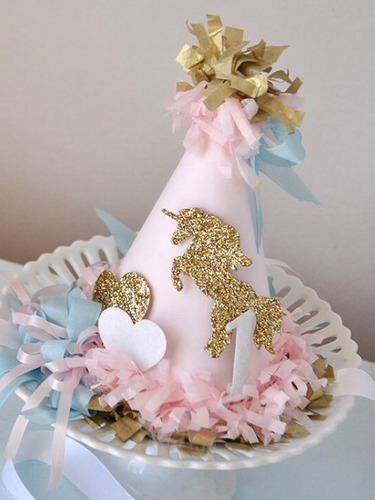
At this point, your baby's first birthday hat is ready. However, I always like to add embellishments that make these hats unique. Depending on the theme of the baby's birthday, the hat will include a number 1 or anything else your customers like.
What you decide to add to the hat is up to you! Scrapbooking embellishments, plus ribbons, buttons, and even stickers make party hats more special. Another option to add a little pizzazz to your baby's party hat is to use patterned cardstock instead of solid cardstock.
Now you know how to make a party hat for a baby or any other occasion, and there are countless possibilities to try.